Home

Meet The Teacher

Class Information

Registration

Tuition

Schedule

Curriculum

Philosophy

Contact Me

Songs

Sunday, October 30, 2011

Holiday Necklace


Here is one of the fun crafts we made at our Halloween party this year.

This necklace could be used for a lot of holidays - hearts for Valentine's Day, clovers for St. Patrick's Day, eggs for Easter, Christmas shapes, etc.

I had one of our fabulous moms cut out 5 Halloween shapes (skull, bat, pumpkin, ghost, and witch's hat) using her silhouette machine. Each shape was about 3 inches across, except the bat was a little longer. I used a mini hole punch to make the holes because I didn't want them to swing as much as if I had used a regular hole punch. (You can find mini hole punches at places like Michael's.) Now that I think about it, you could probably cut the hole with the silhouette if you add it to the image.

Anyway, a fun and easy Halloween necklace is a great way to celebrate!

Here's What You Need
  • Halloween shapes (or other shapes if doing a different holiday)
  • Straws cut into 1 inch pieces
  • Necklace string or chords (I used braiding chords found at Walmart)
Here's What You Do
  1. Put 6 straw pieces on the string. (A great way to stop the pieces from sliding off is to tie one end to a pencil with a lose knot.)
  2. Put on one of the shapes then a straw piece.
  3. Repeat step 2 until you have used all the shapes.
  4. End with 6 straw pieces up the other side.
  5. Tie it off and enjoy!

G is for Ghost

  We made ghost projects for the letter G week and to celebrate Halloween. I did two different projects for the different age groups. The first ghost I did with my older kids. It takes some cutting skills so make sure your kids know how to use the scissors before trying it. 


To make it, print out the image below to whatever size you prefer. Add a face and then cut it out. Cut the tail along the dotted line and make sure to stop on the dot. 
 

For the younger class, we did a different kind of ghost. It was fun because the kids kept calling the stuffing ghost fluff. One of the kids didn't want to touch it, but I finally convinced him that it wouldn't hurt. : )


Here's What You Need:
  • Stuffing
  • Black construction paper
  • Googly eyes
  • White crayon
  • Liquid glue

Here's What You Do:
  1. Draw a ghost shape on the black construction paper.
  2. Cut out two eyes and a mouth out of another piece of construction paper.
  3. Glue the stuffing onto the ghost shape.
  4. Glue on the eye and mouth cut outs.
  5. Glue the googly eyes over the eye cut outs.

Friday, October 21, 2011

Frankenstein or Shrek?

We made the cutest toilet paper roll Frankenstein craft for Halloween and because we were talking about the color green this week. When I showed them to my husband he said, "You're making Shrek?" I guess they do look Shrek-ish and he is a green monster too, but these are Frankenstein in case you were wondering. 


I thought they were pretty cute. Before we started this craft, we read the cutest, funny monster story. I absolutely love it. I found it at my daughter's book fair and I laughed out loud while I was standing there reading it. The book is Even Monsters Need Haircuts by Matthew McElligot. It goes especially well with this project because you have to cut Frankenstein's hair at the end of the project.  


Here's What You Need:
  • toilet paper roll
  • green and black markers or paint
  • two golf tees
  • googly eyes (we used one big and one small)
  • glue dots
  • scissors

Here's What You Do:
  1. Color the bottom half of the roll green and the top black. If using paint, let dry completely.
  2. Add googly eyes with glue dots.
  3. Draw on a mouth and stitches if wanted. 
  4. Poke the golf tees through the sides where the neck would be. (I used a mini hole punch to get it started, you could also start the hole with a pen or knife.)
  5. Cut the top to make it look like hair.


G is for . . .

. . .golfing!

. . . green glue! We decorated letter G's with green glue. To make, just add some food coloring to a bottle of liquid glue. 

. . . green! We tried mixing different things that were blue and yellow. Blue and yellow food coloring, blue and yellow paint, blue and yellow see through plastic pieces, blue and yellow play dough, etc. The kids guessed what color it would make each time before we mixed the things together. Then we made these Venn diagrams.


F is for . . .

. . . float? The kids guessed whether items would sink or float and then tried out their hypothesis.


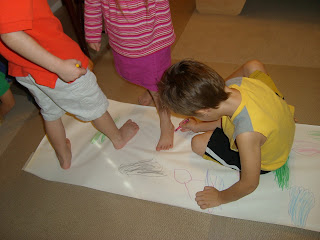
. . . feet! We traced our feet all over a long piece of paper and colored them in. Then we counted how many there were of each color, how many there were all together, and compared which were the biggest or smallest, etc. 

. . . freeze! We danced to "The Freeze" by Greg & Steve. It's basically a freeze dance song with a great beat.

 . . . feel. We explored our sense of touch by feeling things with different textures, temperatures, and feels. - Cold, soft, sticky, hard, bumpy, rough, warm, etc.


F is for Friendship

High five for good friends! We read the book Chester's Way by Kevin Henkes. It is a great book about making new friends and treating each other kindly.


After we read the book, we made a list of five things that good friends do. After we made our list, each child gave a high five to the paper with paint.

Fire Station - 3 Yr. Olds

 F is for fire station. We visited our local fire station to learn more about our community. We were given a tour of their station. They showed us their living quarters, kitchen, weight room, and offices. 


 After we saw the inside of the station, they took us to the garage to see their equipment and trucks.


One of the firemen showed us what it looks and sounds like when they have their suits on so that the kids could understand what a fireman might look like if they came to our house. 


As the kids were on their way out, the firemen gave each child a bag of activities and information and their own firefighter hats. 


The trip was a lot of fun and the kids learned a lot. Thanks to all the parents who joined us!


Fire Station - 4 Yr Olds


 F is for fire station. We visited our local fire station to learn more about our community. We were given a tour of their station. They showed us their living quarters, kitchen, weight room, and offices. 


After we saw the inside of the station, they took us to the garage to see their equipment and trucks.


One of the firemen showed us what it looks and sounds like when they have their suits on so that the kids could understand what a fireman might look like if they came to our house. 


The trip was a lot of fun and the kids learned a lot. Thanks to all the parents who joined us!

Saturday, October 8, 2011

Dinosaur Dioramas

To continue our focus on dinosaurs and the letter D we made dinosaur dioramas. The great thing about this project is that you can make it as simple or as complex as you want to. We kept it simple, but I was starting to think of all the things we could have added to it: eggs, nests, food, trees, etc. Anyway, simple or complex, this was definitely a student favorite.

Here's What You Need:
  • Cracker or shoe boxes
  • Spray paint
  • Tempera paint 
  • Duct tape
  • Easter grass
  • Rocks
  • Fake leaves or vines
  • Hot glue gun
  • Plastic dinosaurs
 Here's What You Do:
  1. Cut off the front of your box and reinforce the sides with duct tape. 
  2. Spray paint the outside. (Tempera paint doesn't work well because of the glossy finish.)
  3. Have the kids paint the inside.
  4. Use the hot glue gun to glue down the easter grass on the bottom and the leaves or vines.
  5. Hot glue some rocks down for the dinosaurs to climb on. (This is actually an important part because the rocks help weigh down and stabilize the front.)
  6. Let the kids add their dinosaur and play!

D is for dig!

We had a great time focusing on dinosaurs this week. One of the things that was the most exciting for the kids was digging for dinosaur bones. We talked about how careful paleontologists are when they dig so we used brushes and our hands to unearth our bones. 

Here's What You Need:
  • box of sand (you can get a bag for cheap at walmart or any hardware store)
  • model  dinosaur set from a craft or hobby store
Here's What You Do:
  1. As you are taking the pieces out, put a small number on matching pieces so that you don't have to look at the directions when you put it together in front of the kids
  2. Practice putting it together! This is also important so the kids believe it's true.
  3. Leave the vertebrates on and any other really small pieces attached and take apart the big pieces.
  4. Bury your bones, but keep one out to show the kids what you found to get them excited about the dig.Remember how many pieces you bury so you know how many to have the kids find.
  5. Dig away! When you've found all the pieces, put it together.
 

Each month, we have a music time taught by an awesome mom/teacher. She taught us a great dinosaur song to go with our dinosaur week. Here it is:
 
(Sung to the tune of "If You're Happy and You Know It)
There are dinosaurs stomping all around.
There are dinosaurs around, they are stomping all around.
There are dinosaurs stomping all around.

*You can replace stomping with other words like flying, swimming, roaring, etc.