


For a tutorial on how to make your own ribbon dancing sticks, click here.
These rubberband rectangles were more of a process than an end. It was so funny to watch the kids show their project to their parents and to watch the parent faces with either a look of confusion or feigned admiration while thinking, um what is that? The kids had a fun time turning their project into something fun, like a table for their barbies or a wrestling ring for their action figures or a pen for their animals.

Anyway, I was more concerned about the building process than I was what it looked like in the end. I wanted the kids to have a chance trying their hand at using a hammer in a safe way. But, we were also working on geometry concepts as we talked about how many sides and corners a rectangle has as well as comparing the length of the sides.
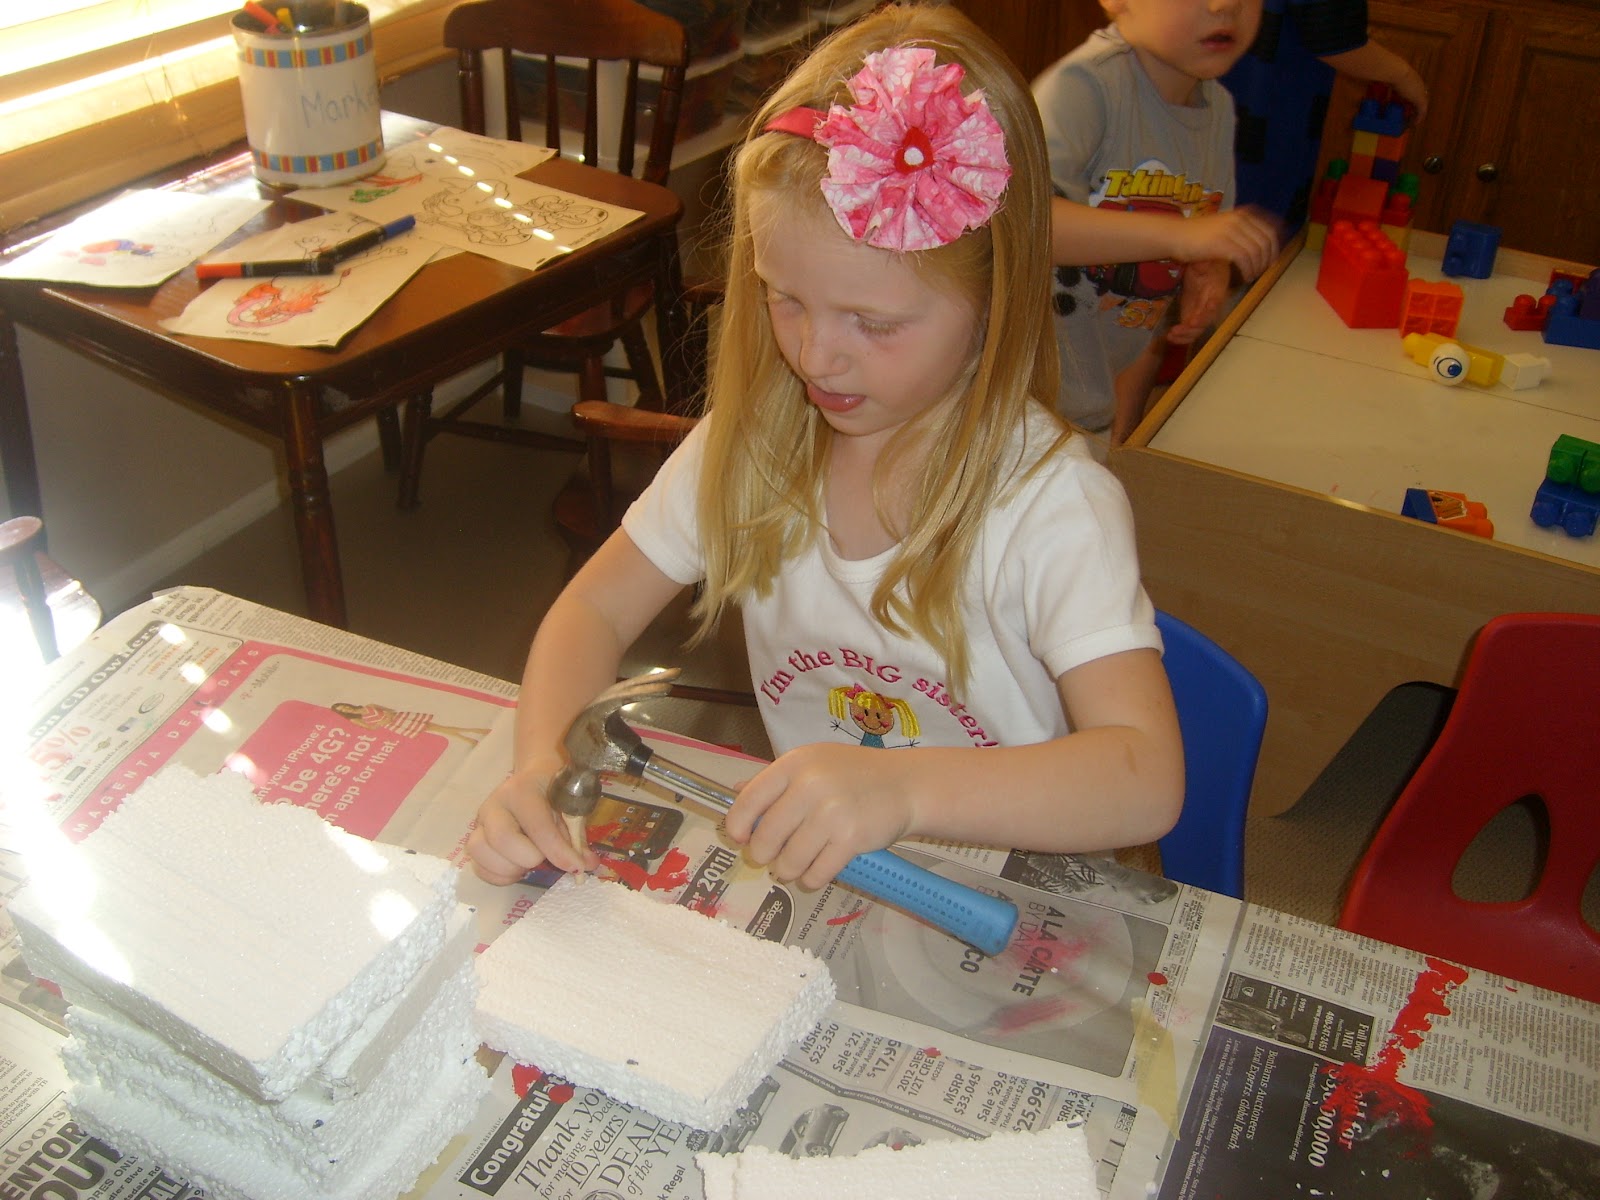

We tried using golf tees and also using large headed nails. The nails worked better, but in the end, all of the corners started to lean a little. Next time, I am going to try to find a really soft wood and use nails so that it doesn't lean. Anyone out there a carpenter and has a suggestion for a good soft wood?
Want to make one?
Here's What You Need:
- Thick styrofoam or thick, soft wood (I found styrofoam sheets at my local hardware store, Ace.)
- Small hammer
- Golf tees or large nails
- rubber bands
Here's What You Do:
- Cut the wood or stryofoam into rectangles
- Discuss how many corners and sides a rectangle has. Compare the length of the sides. Compare the difference between a square and a rectangle.
- Mark the corners with the kids leaving about a 1/2 inch edge on both sides
- Nail the tees or nails into the marks
- Connect the nails with the rubber bands to create the sides of your rectangle.


No comments:
Post a Comment