Home

Meet The Teacher

Class Information

Registration

Tuition

Schedule

Curriculum

Philosophy

Contact Me

Songs

Showing posts with label Halloween. Show all posts

Thursday, October 12, 2017

Simply Awesome Q-tip Skeleton

Skeletons are inspiring us this season and helping us get into the Halloween spirit. For letter B week we learned about our bones and what they do for our body. We learned that bones give us shape and protect us. Without them we would be a mushy puddle on the floor. 
Here's a simple skeleton we made using long and short q-tips. 
Here's What You Need:
5 long q-tips
8 half q-tips
black paper
paper cut out skull
liquid glue
Here's What You Do:
(for younger kids do steps 1 and 2 for them to help them get started)
1. Glue 1 long q-tip to the middle of your page
2. Glue the skull at the top of that q-tip
3. Use the short q-tips to glue ribs on each side of the back bone.
4. Add legs and arms.
Easy peasy lemon squezzy!

Friday, October 9, 2015

Great Halloween Snack!

 We studied bones this week and it reminded me of this great snack we did a couple of years ago. These are a great, easy snack to serve for Halloween. They are made of large pretzels, large marshmallows, and white chocolate. 


 For more detailed instructions, click here. 

Friday, November 7, 2014

Halloween


Every year I plan to post our holiday activities before the holiday so people can use them if they want. And every year, I get busy and it doesn't happen. Sorry everyone. To make up for it, I'll include a video of my cuties performing some Halloween stuff for their parents.


Here's one of the "healthy" halloween snacks we had when we made candy corn mosaics.

Candy corn fruit! It's made with pineapple, oranges, and whipped cream.

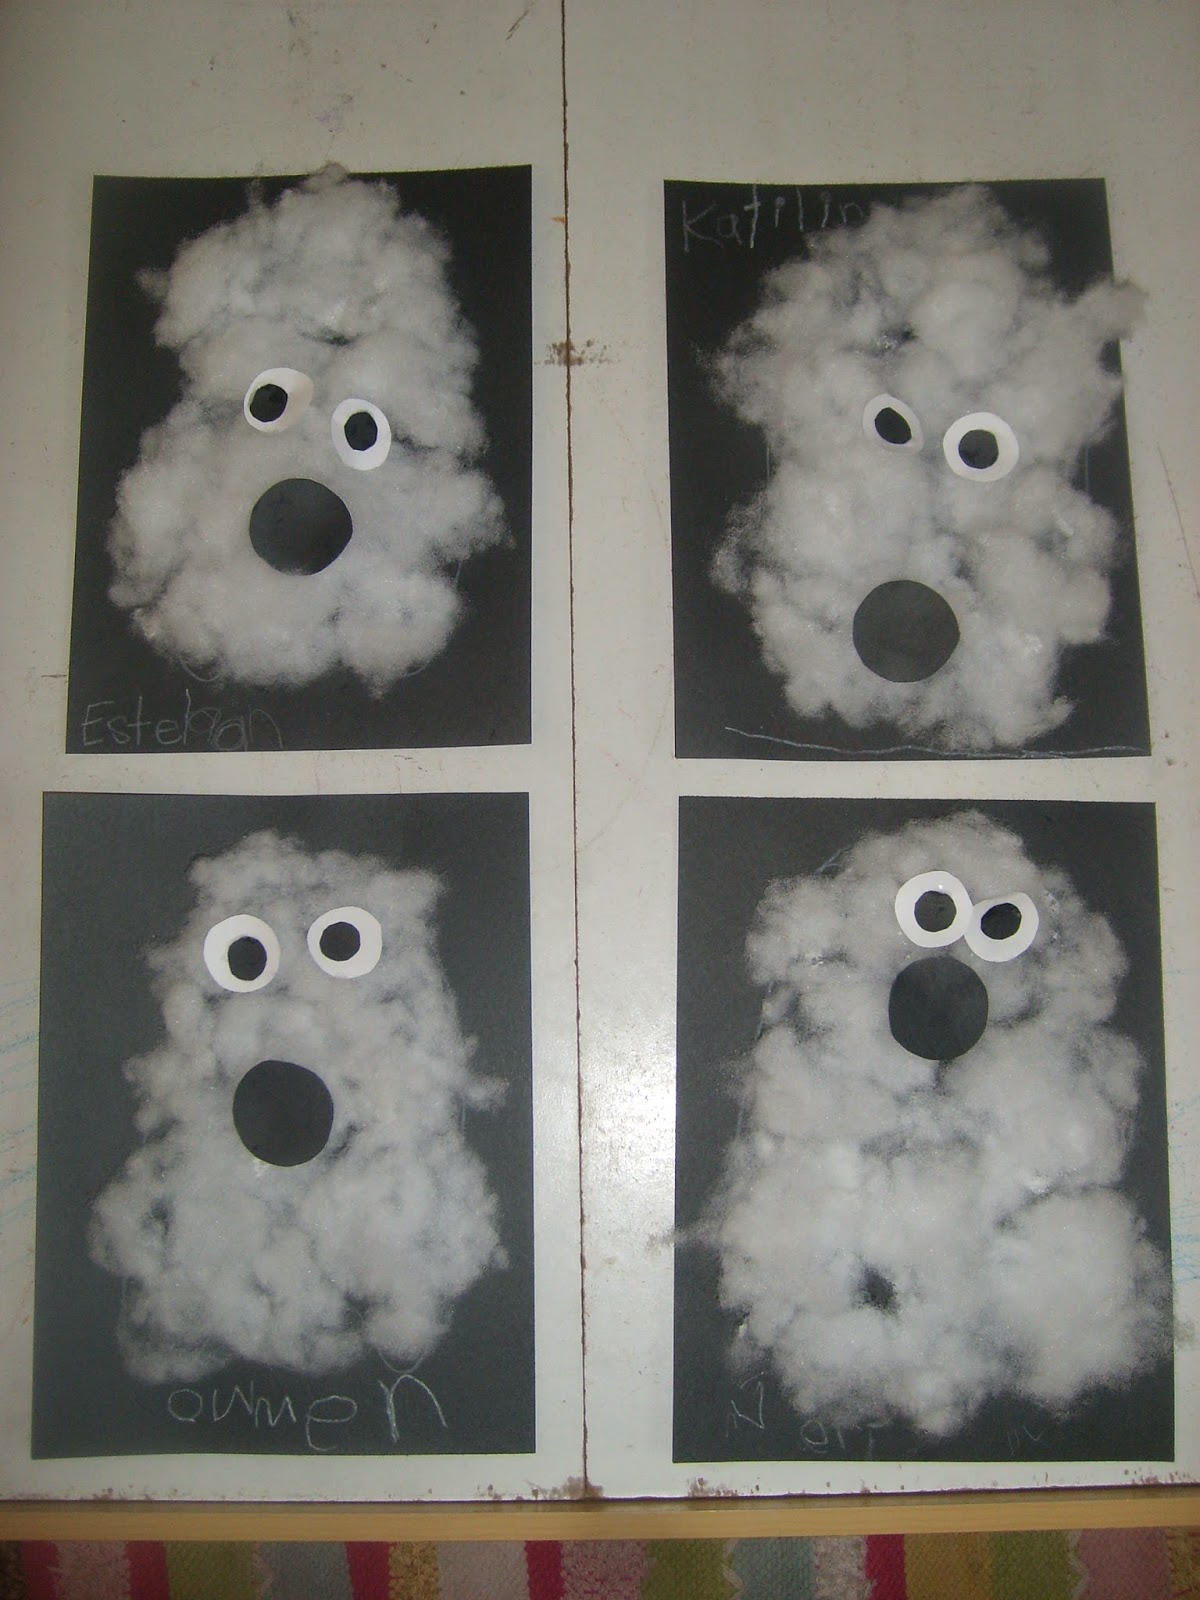
Here are some ghosts we made with real ghost fluff. ;)

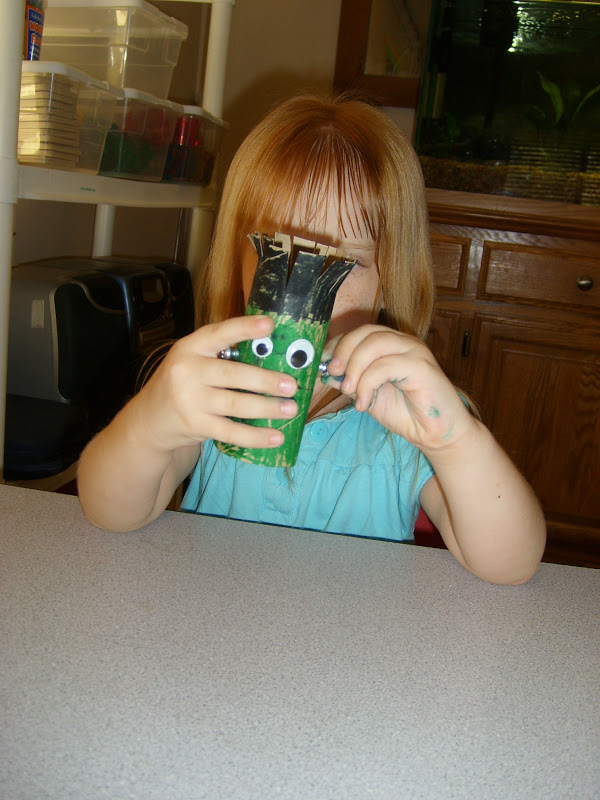
 Here's our Frankenstein craft we made
after reading one of my favorite books, Even Monsters Need Haircuts by Matthew McElligott. Here's a sample page from inside the book.  I'm telling you, it's awesome! The pictures are so much fun.

Here is a song we sung

I'm a mean old witch with a hat!
I ride on my broomstick with my cat!
My nose is pointy and my chin is too.
You better watch out or I might scare you . . . Boo!

and a poem we recited

5 Little Pumpkins
Five little pumpkins sitting on a gate.
The first one said, "Oh my, it's getting late."
The second one said, "There are witches in the air."
The third one said, "But we don't care!"
The fourth one said, "Let's run and run and run."
The fifth one said, "We're ready for some fun!"
Then OOOhh went the wind, 
And out went the lights,
And the five little pumpkins rolled out of sight.

Happy Halloween!

Wednesday, October 31, 2012

Halloween Ideas

I'm baaack. Life sure is crazy with another little one needing love and attention, but we are starting to get back into the swing of things. Hopefully, as things smooth out, I will be able to post regularly again. I'm finding the hardest thing is that as Anya and I do preschool together, half the time I am holding a baby. That makes taking pictures a little more complicated! Anyway, here are some Halloween fun activities and songs we have been doing the last couple of days:

The Skeleton Dance - This is awesome because it is catchy and fun. It is also great because the moves are mirrored so the kids are moving in the right direction. I just wish I would have had it when we studied bones recently.


The Improved Frankenstein - Last year we did this fun Frankenstein, but it kind of looked Shrek-ish. You can see the instructions and picture  here. 
So, we changed the golf tees and screwed in some screws instead.  Once I got the screw started, it was easy for her to keep going. I like it much better! 
 
Of course we had to read our favorite monster story to go with it:

Candy Corn Mosaic -  I have seen this idea on a couple of different websites.  Here is our version. 
 
To begin we looked at, tasted, and talked about candy corn. We talked about color and shape, but I really wanted to focus on the words - top, middle, and bottom. This activity is great for color sorting, scissors practice and practicing vocab: top, middle, and bottom. We started with strips of white, orange, and yellow.  Then cut those strips into squares. We put the white on top, the orange in the middle and the yellow on bottom. Pretty easy, but a lot of fun!


Wednesday, September 12, 2012

Bone X-Rays

As part of our discussion about broken bones and casts we discussed getting an x-ray. We read a great Franklin book (Franklin Goes to the Hospital) about getting x-rays and being brave at the doctor's office. We looked at real pictures of broken bones in the bones books we got from the library. Then we made x-ray pictures. 


We used white glue and q-tips to make our x-ray pictures. Thanks to pinterest for a fun idea!

Friday, September 7, 2012

Bone Snack

 Here are some bones that your little tikes might enjoy gnawing on. I know a lot of you have started thinking about Halloween so make sure to add these to your party snack list. 


We used big pretzel rods, marshmallows, and melted white chocolate to create our concoction. One bag of white chocolate chips made about 6 bones. You could also do small versions with regular straight pretzels and mini marshmallows. They were quick and easy and a big hit with the whole family.


Thanks to familyfun.com for the great idea.

Wednesday, November 9, 2011

Jack-O-Lanterns


I saw this idea on http://www.dltk-kids.com/, but I wanted to re-post it because they are so adorable and I wanted to add a little more detail to the instructions. The first time we made them, they didn't quite go as planned. However, these pumpkins are really easy and fun to do.

Here's What You Need
  • Clean, clear 2 liter soda bottle
  • Orange paint
  • Water
  • Yellow felt or foam paper with a sticky back
  • Green felt
  • Yarn or twine
Here's What You Do:
  1. Put a little bit of water (about a teaspoon - if you add too much, your paint won't stick to the sides) in the bottom of the soda bottle.
  2. Pour some orange paint in. (About 1/4 of a cup)
  3. Tighten the lid and shake it up. If the paint isn't covering the sides sufficiently, add more paint or more water.
  4. Cut out jack-o-lantern faces and stick to the outside of the bottle.
  5. Cut a circle of green felt with about a 5 inch diameter. 
  6. Use the yarn to tie the felt around the top of the bottle.

Sunday, October 30, 2011

Holiday Necklace


Here is one of the fun crafts we made at our Halloween party this year.

This necklace could be used for a lot of holidays - hearts for Valentine's Day, clovers for St. Patrick's Day, eggs for Easter, Christmas shapes, etc.

I had one of our fabulous moms cut out 5 Halloween shapes (skull, bat, pumpkin, ghost, and witch's hat) using her silhouette machine. Each shape was about 3 inches across, except the bat was a little longer. I used a mini hole punch to make the holes because I didn't want them to swing as much as if I had used a regular hole punch. (You can find mini hole punches at places like Michael's.) Now that I think about it, you could probably cut the hole with the silhouette if you add it to the image.

Anyway, a fun and easy Halloween necklace is a great way to celebrate!

Here's What You Need
  • Halloween shapes (or other shapes if doing a different holiday)
  • Straws cut into 1 inch pieces
  • Necklace string or chords (I used braiding chords found at Walmart)
Here's What You Do
  1. Put 6 straw pieces on the string. (A great way to stop the pieces from sliding off is to tie one end to a pencil with a lose knot.)
  2. Put on one of the shapes then a straw piece.
  3. Repeat step 2 until you have used all the shapes.
  4. End with 6 straw pieces up the other side.
  5. Tie it off and enjoy!

G is for Ghost

  We made ghost projects for the letter G week and to celebrate Halloween. I did two different projects for the different age groups. The first ghost I did with my older kids. It takes some cutting skills so make sure your kids know how to use the scissors before trying it. 


To make it, print out the image below to whatever size you prefer. Add a face and then cut it out. Cut the tail along the dotted line and make sure to stop on the dot. 
 

For the younger class, we did a different kind of ghost. It was fun because the kids kept calling the stuffing ghost fluff. One of the kids didn't want to touch it, but I finally convinced him that it wouldn't hurt. : )


Here's What You Need:
  • Stuffing
  • Black construction paper
  • Googly eyes
  • White crayon
  • Liquid glue

Here's What You Do:
  1. Draw a ghost shape on the black construction paper.
  2. Cut out two eyes and a mouth out of another piece of construction paper.
  3. Glue the stuffing onto the ghost shape.
  4. Glue on the eye and mouth cut outs.
  5. Glue the googly eyes over the eye cut outs.

Friday, October 21, 2011

Frankenstein or Shrek?

We made the cutest toilet paper roll Frankenstein craft for Halloween and because we were talking about the color green this week. When I showed them to my husband he said, "You're making Shrek?" I guess they do look Shrek-ish and he is a green monster too, but these are Frankenstein in case you were wondering. 


I thought they were pretty cute. Before we started this craft, we read the cutest, funny monster story. I absolutely love it. I found it at my daughter's book fair and I laughed out loud while I was standing there reading it. The book is Even Monsters Need Haircuts by Matthew McElligot. It goes especially well with this project because you have to cut Frankenstein's hair at the end of the project.  


Here's What You Need:
  • toilet paper roll
  • green and black markers or paint
  • two golf tees
  • googly eyes (we used one big and one small)
  • glue dots
  • scissors

Here's What You Do:
  1. Color the bottom half of the roll green and the top black. If using paint, let dry completely.
  2. Add googly eyes with glue dots.
  3. Draw on a mouth and stitches if wanted. 
  4. Poke the golf tees through the sides where the neck would be. (I used a mini hole punch to get it started, you could also start the hole with a pen or knife.)
  5. Cut the top to make it look like hair.