Skeletons are inspiring us this season and helping us get into the Halloween spirit. For letter B week we learned about our bones and what they do for our body. We learned that bones give us shape and protect us. Without them we would be a mushy puddle on the floor.
Here's a simple skeleton we made using long and short q-tips.
Here's What You Need:
5 long q-tips
8 half q-tips
black paper
paper cut out skull
liquid glue
Here's What You Do:
(for younger kids do steps 1 and 2 for them to help them get started)
1. Glue 1 long q-tip to the middle of your page
2. Glue the skull at the top of that q-tip
3. Use the short q-tips to glue ribs on each side of the back bone.
We studied bones this week and it reminded me of this great snack we did a couple of years ago. These are a great, easy snack to serve for Halloween. They are made of large pretzels, large marshmallows, and white chocolate.
I'm baaack. Life sure is crazy with another little one needing love and attention, but we are starting to get back into the swing of things. Hopefully, as things smooth out, I will be able to post regularly again. I'm finding the hardest thing is that as Anya and I do preschool together, half the time I am holding a baby. That makes taking pictures a little more complicated! Anyway, here are some Halloween fun activities and songs we have been doing the last couple of days:
The Skeleton Dance - This is awesome because it is catchy and fun. It is also great because the moves are mirrored so the kids are moving in the right direction. I just wish I would have had it when we studied bones recently.
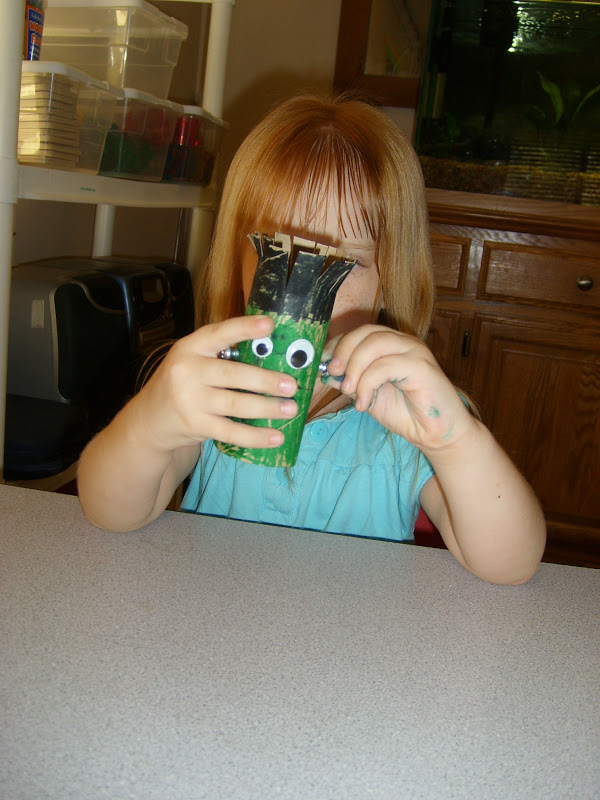
The Improved Frankenstein - Last year we did this fun Frankenstein, but it kind of looked Shrek-ish. You can see the instructions and picture here.
So, we changed the golf tees and screwed in some screws instead. Once I got the screw started, it was easy for her to keep going. I like it much better!
Of course we had to read our favorite monster story to go with it:
Candy Corn Mosaic - I have seen this idea on a couple of different websites. Here is our version.
To begin we looked at, tasted, and talked about candy corn. We talked about color and shape, but I really wanted to focus on the words - top, middle, and bottom. This activity is great for color sorting, scissors practice and practicing vocab: top, middle, and bottom. We started with strips of white, orange, and yellow. Then cut those strips into squares. We put the white on top, the orange in the middle and the yellow on bottom. Pretty easy, but a lot of fun!
As part of our discussion about broken bones and castswe discussed getting an x-ray. We read a great Franklin book (Franklin Goes to the Hospital) about getting x-rays and being brave at the doctor's office. We looked at real pictures of broken bones in the bones books we got from the library. Then we made x-ray pictures.
We used white glue and q-tips to make our x-ray pictures. Thanks to pinterest for a fun idea!
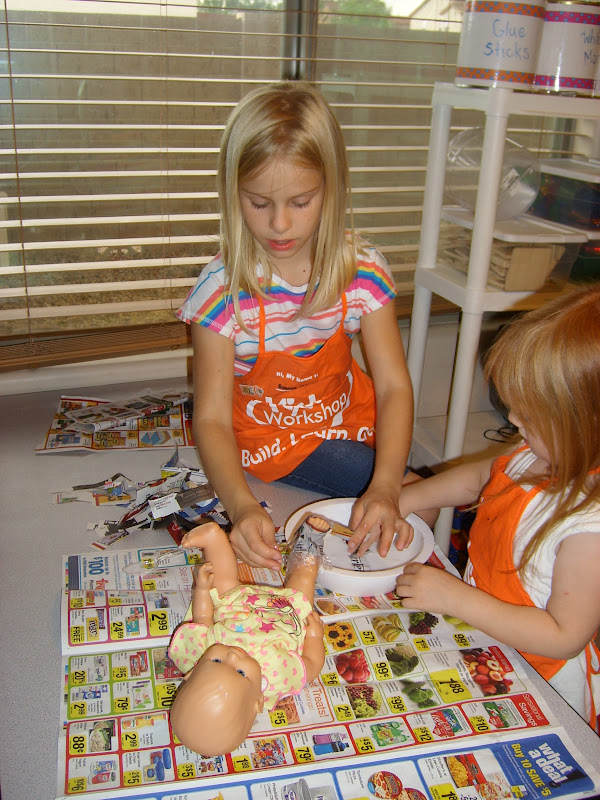
We had a sad thing happen this week. One of our baby dolls broke her foot. : ( So Doctor Emma helped us fix her up with a cast so she could heal. Luckily, she is being brave and letting mommy take care of her while she recovers.
The girls had fun playing doctor (despite the fact that we don't have any doctor dress up stuff. I think we might have to remedy that pretty soon). When it was determined that baby would have to get a cast, we went right to work.
We used paper mache and paint to create our pretend cast. It was pretty fun and it was actually pretty easy. Here's the step by step in case you are ever unfortunate enough to have your baby doll break their foot.
Here's What You Need:
plastic doll
saran wrap
newspaper
white glue
water
paint
Here's What You Do:
1. Make sure you are using a plastic doll in case the paint or paper mache gets onto the leg or foot. Cover the area with saran wrap to prevent the newspaper from bleeding onto the doll.
2. Cut your newspaper into small strips.
3. Mix water into the glue so it's about a 3:1 ratio. I didn't measure, just added it until it looked good. Then dip the newspaper into the mixture. Carefully pinch out any extra moisture by running the strip between two of your fingers. Then wrap around the leg. Repeat until the whole area is covered.
4. After it has dried for a day or two, paint the cast. - We did two coats.
Hopefully, your baby will recover quickly! When it's time to cut the cast off, just use a pair of scissors.
Here are some bones that your little tikes might enjoy gnawing on. I know a lot of you have started thinking about Halloween so make sure to add these to your party snack list.
We used big pretzel rods, marshmallows, and melted white chocolate to create our concoction. One bag of white chocolate chips made about 6 bones. You could also do small versions with regular straight pretzels and mini marshmallows. They were quick and easy and a big hit with the whole family.
We decided to study our bones for letter B week. Most kids don't understand what their bones are for. Here is a simple object lesson to teach what our bones are for.
Here's What You Need:
Cut out of a human body on plain printer paper
Popsicle sticks or skinny sticks (found by the popsicle sticks)
Tape
Here's What You Do:
1. Discuss what different parts of our body are for: eyes - to see, ears - to hear, stomach - to hold food, mouth - to talk and eat, etc.
Ask - What are our bones for?
2. Show the body cut out and ask the kids if it can stand up by itself.
Explain that this is what our body would be like if we didn't have bones. Bones help us have shape. They are like the frame for a house.
3. Tape popsicle sticks to the body cut out - give it some bones - and then see if it can stand up.
What would we be without our bones? A puddle on the floor!
Teaching is my passion! I have been teaching in one capacity or another for the last 9 years. I believe in making the classroom safe, fun, and educational. Read more about my credentials in the Meet the Teacher section.