Home

Meet The Teacher

Class Information

Registration

Tuition

Schedule

Curriculum

Philosophy

Contact Me

Songs

Showing posts with label Spring. Show all posts

Friday, January 22, 2016

E is for Egg: Hatching Chicks

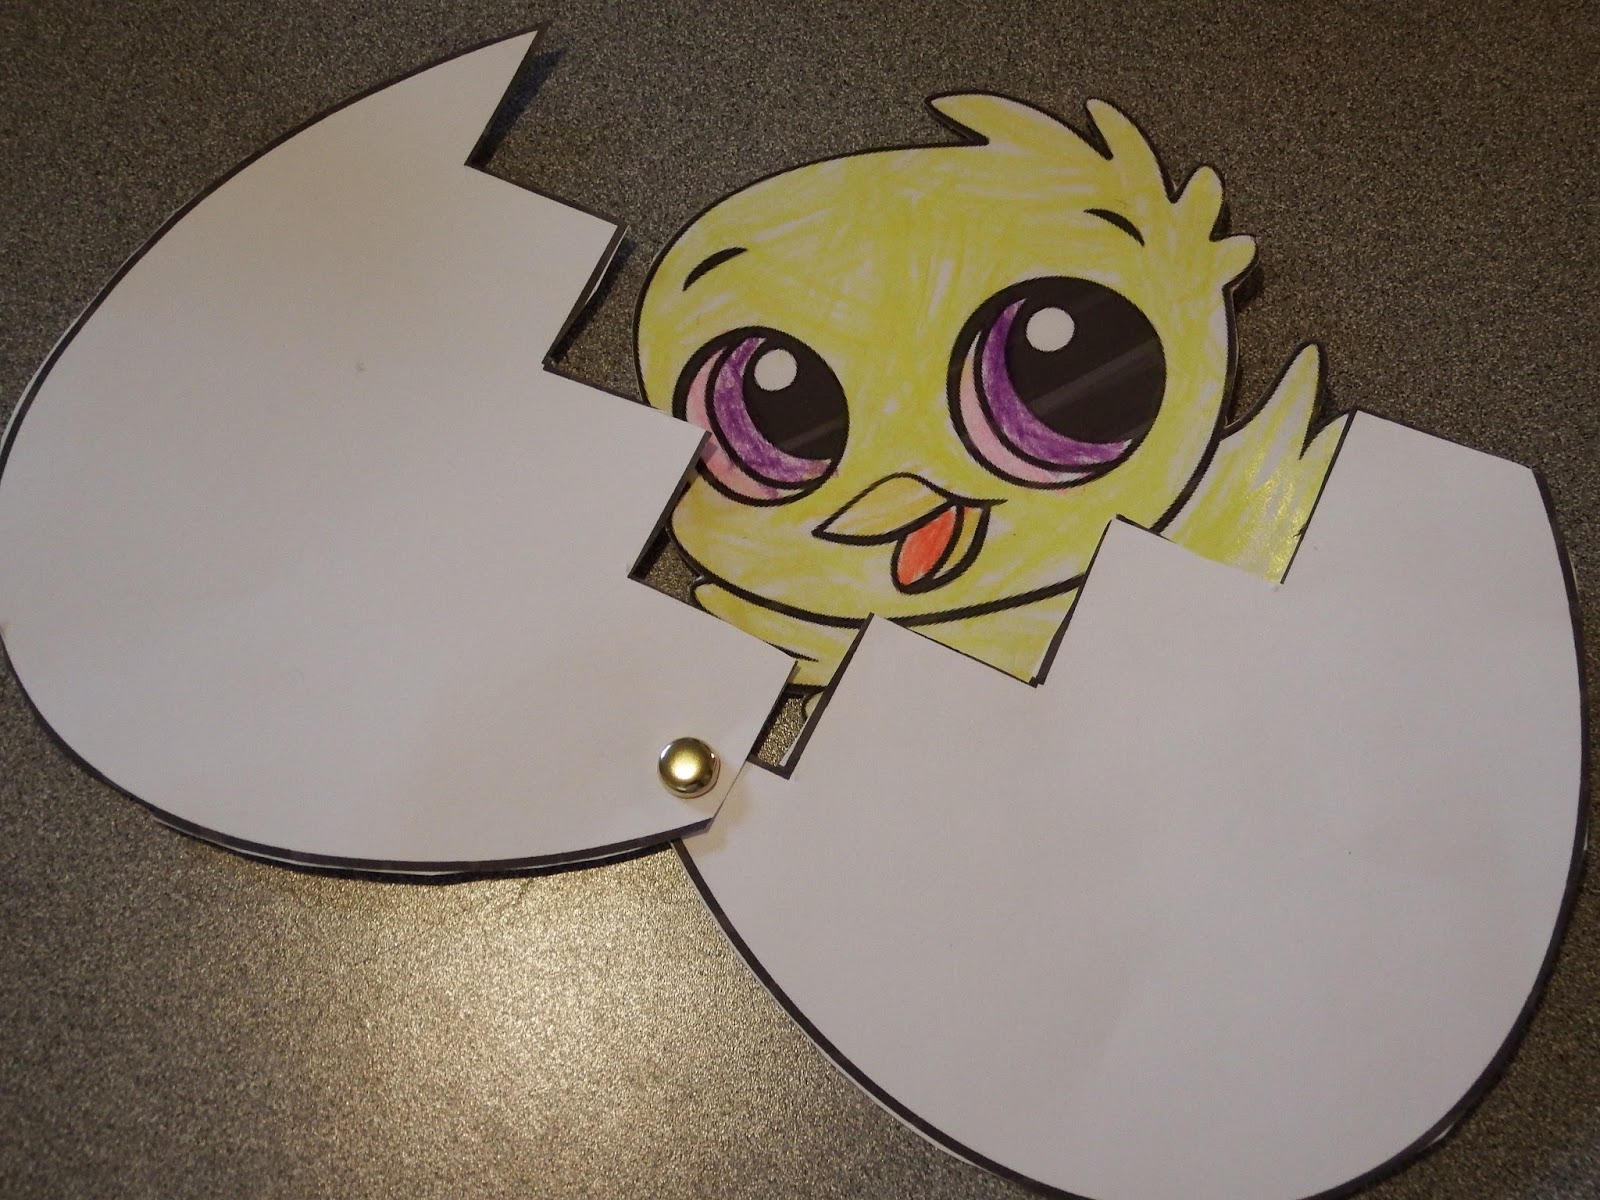
Here is a cute little egg project we did during letter e week. Before we hatched our own chicks, we read the book Horton Hatches an Egg.


I printed both papers on cardstock and pre-cut out the chicks for the kids. They colored the chicks and cut out the eggs. 

We glued the chick to the back of the bottom egg.

Then we used a brad so the chick could hatch out of the egg. 

If you would like to make your own hatching chicks, click here for a free printable. 

When you click on the link, there are a lot of ads on the page. You want to click the small grey download button right beneath the box that says view document. You will need to sign in to download the paper. You can sign up for a free 4shared account or use your social media outlet to download. Please leave a message below if you have any problems or questions. 


Thursday, March 26, 2015

Spring Time Song with Finger Puppets

 Spring is upon us and summer is fast approaching. In our neck of the woods, everyone is planting their gardens and the roses are starting to bloom. Here is a fun spring time song with finger puppets for the kids to play along while you sing. 
It is titled In the Leafy Tree Tops. It is from the Church of Jesus Christ of Latter-Day Saints children's songbook. The song can be listened to or downloaded at lds.org. Or you can go directly to the song here.

When we sing this each child has a flower on a popsicle stick and a bird finger puppet. Cut out the circles where the beak should be and their thumb and pointer finger become the beak. My holes are a little small, so you might have to cut a little bigger than what is drawn. I printed the bird to be about 5 inches tall.


In the Leafy Tree Tops
 In the leafy treetops, the birds sing "Good morning."
They're first to see the sun.
They must tell ev'ryone.
In the leafy treetops, the birds sing "Good morning."

In my pretty garden, the flowers are nodding.
"How do you do?" they say.
"How do you do today?"
In my pretty garden, the flowers are nodding.

I hope you have a great spring and that the birds sing and flowers bloom in your garden!

Tuesday, March 24, 2015

Spring Trees

 Here in Utah spring has come early. I know it means we will get a crazy frost in May that is going to kill all our fruit buds, but I am trying to be positive and enjoy the beautiful weather while we can. This is the view out my front window. It's amazing and it smells just as pretty as it looks.


In our church we have a time during church where the kids have music time and sing songs. One song is called Popcorn Popping by Georgia Bello and it is a song about spring time. 

  1. I looked out the window, and what did I see?
    Popcorn popping on the apricot tree!
    Spring had brought me such a nice surprise,
    Blossoms popping right before my eyes.
    I could take an armful and make a treat,
    A popcorn ball that would smell so sweet.
    It wasn't really so, but it seemed to be
    Popcorn popping on the apricot tree.
(Here's a link to the music and a free mp3.) 

Our neighbor has a "popcorn" tree so we sang the song and then went outside to look at it. Then we decided to make our own spring trees like the fall and winter trees we made earlier in the year.
 
I popped some popcorn without oil or butter so it wouldn't make grease marks on the paper. It was so simple. Put about 1/3 c popcorn kernels in the bottom of an opened paper bag. Fold over the top two or three times. Put it in the microwave and cook until there is a 1 - 2 second delay between pops. (Mine took about 2 minutes) Then take it out and enjoy your healthy, air popped popcorn. Easy peasy!

Then the kids glued the popcorn onto their colored tree. Make sure they do a pretty good puddle of glue so that the popcorn sticks since it isn't flat. 

Wednesday, April 9, 2014

Paper Plate Easter Bunny

Here's an old picture I had of a project we did last year. It's simple and cute, and your kids will love it! For the ears, I used a little less than half the plate. Half looked a little too fat for my taste, so I just cut a thin section off the straight side of each ear. 


What You Need:

  • 2 paper plates
  • pink and black crayons or markers
  • googly eyes
  • white cotton balls
  • small pink pompom
  • bow tie - you can use paper or get fancy and use fabric
What You Do:
  1. Color the inside of the ears pink.
  2. Glue on the ears to the back of the full plate
  3. Glue on the eyes and nose
  4. Draw on the face
  5. Glue on the bow tie
Easy peasy lemon squeezy!


Wednesday, April 2, 2014

P is for Platypus

So a platypus is one of those crazy, weird, yet interesting animals. It kind of makes me think that God was in a silly mood the day He made them. Even the name is kind of silly. Okay, pop quiz! Which of these facts are true about the platypus?

a. It consists of a beaver tail, duck bill, & otter feet.
b. When naturalists first discovered it, some thought it was a hoax.
c. It is venomous.
d. It is one of 5 egg laying mammals.
e. There is no universally used plural form of the word platypus. Both platypuses and platypi are acceptable.
f. All of the above.

F is correct! Isn't that crazy?

Of course this unique animal has gotten an extra measure of fame lately due to this amazing show, I'm sure you've heard of it.


We decided to study more about the platypus and make an Agent P Easter egg for letter P week. I mean his name is P and what is more perfect than that for letter P week?


We started at  the National Geographic Kids website and checked out their platypus creature feature page. It includes pictures, facts, a video, and a map of where they live. 

Then we made the Perry the platypus Easter egg from Family fun. The link to the craft is here.


Here's What You Need:

  • Template printed from family fun
  • bottle cap
  • greenish blue egg (plastic or hard boiled)
  • Glue dots
Here's What You Do:
  1. Color and cut out the template. Make sure to draw the crisscrosses on his tail and a band on his hat.
  2. Glue the feet and tail to the inside of the bottle cap. Bend the feet over the edge of the rim so they are pointing down. 
  3. Glue the face and arms onto the egg. Wrap the hat around the top of the egg and glue the two back pieces together with a glue dot. Bend it so it sticks up.
  4. Put your egg in the bottle cap to keep it upright.

We hope you have fun with your own weird, yet cool platypus egg. 


Thursday, March 27, 2014

Handprint Bird in Nest

 Spring is such a fickle time. Yesterday was 70 degrees here and today it snowed. Oh, sun we want you to come and stay. Sigh. At least we get to see the sun more often and it's fun to see the buds on the trees. We were so excited to find out that the previous owners of our house planted daffodils around our front window. It is also fun to hear birds chirping in the morning. (Except maybe not this morning because we were having a crazy storm - snow & hail & wind) 
   
Speaking of birds, here is a great bird project to do with your little ones. I must subconsciously like birds because looking back, this is the 3rd bird project we've done. 


This one is pretty simple. Make the bird's body with a painted handprint. Add an eye and beak. Give the bird a place to roost using ripped paper art. Glue on ripped brown paper pieces to add interesting depth to your picture. 


Easy Peasy!
If you are interested in a more intensive spring project, try our bobble head chicks. This link also has a great tutorial for easy 3-D bird nests.

Or, for a more whimsical bird, try our balloon birds. 

Thursday, April 5, 2012

Bobble Head Chicks & Nests

  These are some quirky little chicks that we made for Easter. You use egg cartons and wire to make these fun little friends that bobble their head whenever they move.  My daughter and I made one to test out the directions. When we were done I kind of didn't know what I thought, but then I saw that little head wobble and it brought a big smile to our faces.


Before we made our chicks and nests, we talked about baby animals being born in the spring and discussed how birds use lots of different materials to make nests for their chicks.  

Here is our chicky nesting outside in our homemade nest. 


Here is a picture of the head tilting so you can kind of see what makes the bobble bob. 


To go along with our bobble head chicks, we made them nests to roost in until they learn to fly.


With my older class, I assembled most of the chick and the kids added eyes and feathers. It took a while to make 9 of those cuties so I decided to simplify with the younger class.** The kids made the nests for their birds and I provided them with these cute little toy chicks to inhabit their nest. 


**Making this with one or two kids isn't a big deal, but doing it on a large scale was a little more tricky. I wouldn't suggest doing this with more than two or three kids at a time unless the kids are older. 

Want to make your own chick or nest? 

Bobble Head Chick

Here's What You Need:

2 cardboard egg carton cups
paint
feathers
card stock
googly eyes
tape
24 mm gauge craft wire (It has to be this gauge to make the bobble work correctly)

Here's What You Do:
  1. Cut one of the egg carton cups so it sits flat.
  2. Cut the second cup to a height of about 3/4 inch. 
  3. Paint the cups and let them dry.
  4. Cut out feet and beak from card stock and glue or tape them inside the cups. Glue the eyes on. 
  5. Wrap 6 inches of wire around a pen. 
  6. Use a push pin to make a hole in  the top of the larger cup.
  7. Insert a full circle of wire into the hole and tape to the top of the cup.
  8. Tape another circle of coil into the top of the smaller cup. 
  9. Glue on feathers.
Homemade Bird Nests

Here's What You Need:

brown paper bag
straw, yarn, leaves, twigs or other things to add to your nest

Here's What You Do:
  1. Roll the paper bag inside itself and keep rolling down until you reach the bottom. Squish and squeeze the sides until the bag resembles a nest shape.
  2. Glue on yarn, twigs, sticks, straw, etc to make your nest soft for your new chick. 


Ideas were originally found from Family Fun magazine. 

Friday, May 6, 2011

Let's Go Fly a Kite!


Since we were talking about spring this month, I thought it would be really fun to make kites. This project ended up being one of those exciting moments when you're goofing around and you create something great! I kind of frankensteined a bunch of kite ideas I saw online so when I made it and tested it out, I was thrilled that it flew and that it flew pretty well for a homemade kite. It's kind of a hybrid kite meets paper airplane.

Here's What You Need:
  • Construction Paper
  • Crayons
  • String or yarn
  • Tape
  • Small Hole Punch
  • Bamboo Skewer
  • Scissors
  • Crepe Paper
Here's What you Do:
(This is just a picture to help show what it will look like, it isn't meant to be printed as a pattern. The dotted lines are the places you will fold.)
  1. Fold the construction paper in half.
  2. At the top mark a line 1 inch from the folded corner.
  3. At the bottom mark a line 2 1/2 inches from the folded corner.
  4. Connect the lines.
  5. Draw butterfly wings using the line you just drew as the body of the butterfly. Try to conserve as much of the paper as possible. Cut out the wings and body while your paper is still folded so they are symmetrical.
  6. Decorate the butterfly using crayons.
  7. Fold on the lines you drew for the body and tape the wings together with a long strip of tape to make a flat top.
  8. Cut bamboo skewer to 9 inches. I found that the best way to cut it without splintering it is to notch it with the scissors at the length that you want. Then put your two thumb nails into the notch back to back and snap it.
  9. Using small strips of tape, tape the bamboo skewer across the top of the wings.
  10. Punch a hole about 3 inches down on the body and reinforce it with a piece of tape.
  11. Tie about 3 yards of string to the hole. (Anyone like my homemade kite stand? Yup, that's playdough we used during center time. : )
  12. Tape two 12 inch pieces of crepe paper to the body, one on each side of the end. It is important that the strips are the same length or your kite will fly in circles.
  13. Take it outside and enjoy your kite!

Wednesday, April 27, 2011

W is for Worm

Today we ate dirt and worms.

Before we did that, we talked about worms and how they help the flowers grow in the spring and read a book about worms. We listened to the middle part of the Inchworm song from Sesame Street and moved around like worms.


Then we ate dirt and worms.

Here's You Need:
(I know you didn't really think we ate dirt and worms. : )
  • Instant Chocolate Pudding
  • Milk
  • Oreos or other chocolate cookies
  • Sandwich bags that seal
  • Gummy worms
Here's What We Did:
  1. We made some mud. (Chocolate pudding)
  2. We smashed some dirt. (Oreo cookies)
  3. We put some mud in a cup and poured the dirt on top of it.
  4. We added worms.

Friday, April 15, 2011

V is for Vine

Spring time is when the vines start to grow and vine starts with the letter v so we made vine pictures this week. I love the 3-D aspect of this project.


To go along with the project we learned and acted out a poem about seeds.

Little Brown Seeds

Little brown seeds so small and round,
Are sleeping quietly under ground.
Down come the raindrops
Sprinkle, sprinkle, sprinkle.
Out comes the rainbow,
Twinkle, twinkle, twinkle.
Little brown seeds way down below,
Up through the earth they grow, grow, grow.
Little green leaves come one by one.
They hold up their heads and look at the sun.

- Author Unknown

Here's What You Need:
  • Green crepe paper (streamers)
  • Construction paper
  • White glue
  • Green leaves
Here's What You Do:
  1. Cut a long strip of crepe paper. Twist it semi tightly the whole length.
  2. Draw a vine like line across the construction paper with the white glue.
  3. Press the twisted crepe paper along the line.
  4. Repeat steps 1 - 3 until your picture looks the way you want it to.
  5. Add leaves.


Thursday, April 7, 2011

Up, up bird!

Spring time = baby birds. Baby birds + letter U week = Up Bird!


Birds that fly up in the sky were our craft for this week. (You can't really tell, but the bird in the picture was up on the ceiling.) We helped the birds fly by making them wings. We read The Magic School Bus Flies From the Nest and learned about how baby birds grow in the Spring time and then learn how to fly. Then, we made wings for our own birds.

Here's What You Need:
  • Balloons (You can use helium or not. The helium are fun because they fly on their own, but it is also fun to hit the other ones around to make them fly. If you get helium, you need to get them the morning of, or there won't be enough helium left to keep the birds afloat once they have their face and wings.)
  • White Vinyl or large address labels for the eyes
  • Yellow paper cutouts of the beaks (See extra instructions below)
  • Coffee filters
  • Washable markers
  • Spray bottle filled with water
  • Packing tape
Beak Assembly (these beaks come from the mailbox magazine.):
  1. Cut out the upper and lower piece.
  2. Cut on the dotted lines and fold on the double lines.
  3. After you have folded on the double lines, the pointy parts of the drawing should be close to touching. Pull those pointy parts together so that they overlap and tape it together. Do this for both the upper and the lower beak.
  4. Flip the lower beak upside down and tape inside the upper beak.
  5. If you want to you can slightly crease the beaks in the middle to make them stick out more.


Here's What You Do:
(I did steps 1 - 5)
  1. Fill balloons to desired size.
  2. Cut out and assemble beaks. Tape onto the balloon
  3. Cut out two ovals from the vinyl or address labels and add black pupils for the eyes.
  4. Stick onto balloon above the beak.
  5. Cut wing shapes out of the coffee filter paper. Each child will need two.
  6. Color the coffee filter wings with washable marker.
  7. Spray a couple of times with a water bottle to make the colors bleed and let dry.
  8. Tape wings on the side of the balloon with packing tape.
As always, if you need help, please just ask!

After doing this a couple times, I do have a few suggestions:
  1. Make sure you get the high float helium in the balloons.
  2. It's best to try to get them the day of the project if possible.
  3. Always get a few extra because some of the balloons just don't handle the extra weight as well.
  4. Use the lightest materials possible to insure a better flight.  
  5. We used a simpler beak pattern this year.  It was only a top beak and I drew it out roughly like the picture below. (No making fun of my lame paint shop skills.: ) You cut out the shape and fold on the dotted lines. Overlap the tabs at the top and tape them together.